Garden guide · Canada

How to grow daylilies

The complete care guide — from planting and dividing to bloom time, reblooming, hostas for shade and the companion perennials that round out a border. For brand-new gardeners and seasoned growers alike.

1 dayeach bloom, many per scape
3–9hardiness zones
6+ hrssun for best bloom
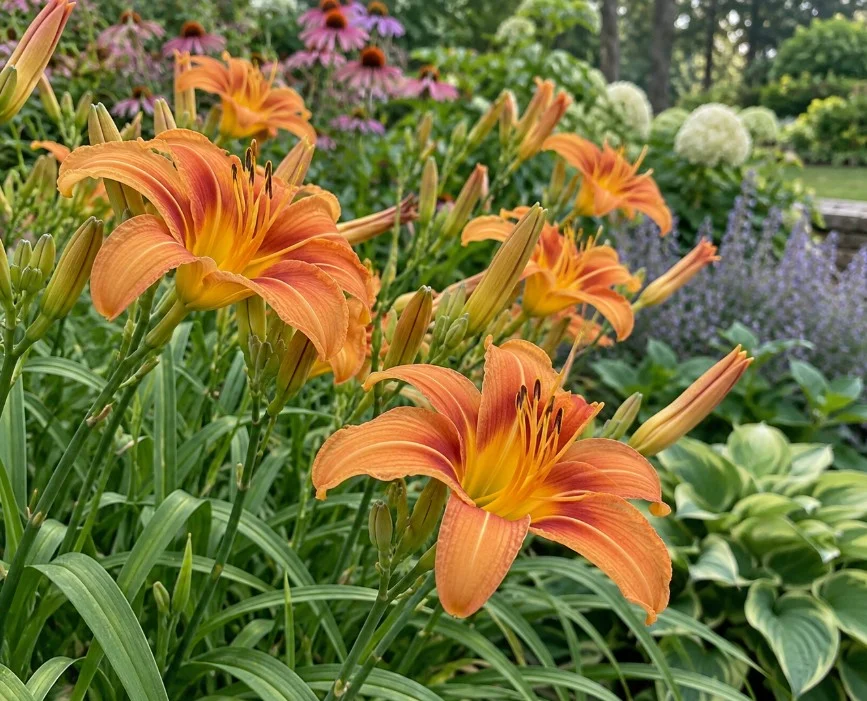
Orange daylilies in full bloom in a summer garden
Low-maintenance · long-blooming
Start here

The easiest perennial you can plant

Daylilies (Hemerocallis) have earned the nickname “the perfect perennial” for good reason: they are tough, adaptable, drought-tolerant once established, and they bloom for weeks in the heart of summer. Despite the name, they are not true lilies and grow from fleshy roots rather than bulbs.

Each individual flower opens for a single day — that is where the name comes from — but every flower stem, called a scape, carries many buds. A healthy clump can open fresh flowers for three to five weeks, and reblooming varieties return for a second show later in the season.

They thrive across a wide range of climates, roughly hardiness zones 3 to 9, which covers most of Canada. They shrug off cold winters, poor soil and heat, and they are rarely troubled by pests. If you have never kept a perennial alive, this is the plant to start with.

Their versatility is the other reason gardeners love them. Daylilies work as a mass planting on a bank, as a tidy edging along a path, mixed through a perennial border, or in large containers on a deck. There are tens of thousands of named varieties in almost every colour but true blue, in heights from 20 cm dwarfs to metre-tall giants — so there is a daylily for nearly any spot that gets sun.

Daylilies at a glance

  • Light: full sun to light shade; 6+ hours for best bloom.
  • Soil: average, well-drained; tolerates clay and sand.
  • Water: regular until established, then drought-tolerant.
  • Bloom: early, mid or late summer depending on variety.
  • Lifespan: long-lived; divide every 3–5 years.
How to grow

Planting daylilies, step by step

Get the planting right and daylilies mostly look after themselves. Here is everything that matters, in order.

1. Pick the spot

Choose a site with at least six hours of direct sun. Darker-flowered varieties hold their colour better with a little afternoon shade, but shade overall means fewer blooms.

2. Prepare the soil

Daylilies are not fussy, but they reward a spot enriched with compost. Aim for well-drained ground; they dislike sitting in constant wet, especially over winter.

3. Set the crown

Plant so the crown — where roots meet leaves — sits about 2.5 cm (one inch) below the surface. Planting too deep is the most common reason a daylily sulks and fails to bloom.

4. Space them out

Leave 30–45 cm (12–18 inches) between plants. They fill in fast, and crowding leads to fewer flowers and earlier division.

5. Water in

Soak well at planting and keep new plants watered for the first few weeks. A layer of mulch holds moisture and keeps weeds down while they settle.

6. Feed lightly

In fertile soil they need little. A single spring feed of a balanced fertilizer such as 10-10-10 is plenty; too much nitrogen gives lush leaves and few flowers.

After the first season, care is minimal. Daylilies are genuinely drought-tolerant once their roots are deep, so established clumps rarely need watering except in long dry spells. A spring tidy-up and the occasional division are all most plants ever ask for.

Growing in containers works well, too — useful on a patio or where soil is poor. Use a large pot with drainage holes and a quality potting mix, water more often than you would in the ground (pots dry out fast), and either sink the pot or move it to a sheltered spot for winter in colder zones, since roots are more exposed to freezing in a container than in open ground.

Spring and early fall are the best planting times. If planting in fall, allow at least six weeks before a hard freeze so roots can establish.


Interactive

Find the right plant for your spot

Filter by light, bloom season and height to see which daylily styles — and shade companions — suit your garden. A quick way to plan a bed that flowers for months.

Light
Season
Height

Early sun bloomers

Mid-height daylilies that open first, kicking off the season in a sunny border and setting the stage for later flowers.

Full sunEarlyMid-border

Tall midsummer accents

Statuesque scapes for the back of a sunny bed, flowering at the peak of summer when the garden is at its fullest.

Full sunMidsummerTall

Reblooming varieties

Types that flower in early summer and return for a second flush later, stretching colour into late season. Deadhead to encourage repeat bloom.

Full sunLateRebloom

Dwarf front-of-border

Compact, low-growing daylilies perfect for edging a path or the front of a sunny bed, often with a long bloom window.

Full sunMidsummerLow

Part-shade tolerant

Many daylilies accept a few hours of shade; pale and pastel flowers in particular keep their colour better out of harsh midday sun.

Part shadeMidsummerMid-border

Spider & unusual forms

Narrow, spidery petals and star shapes add an airy, architectural look — striking in a lightly shaded spot where their form reads against foliage.

Part shadeEarlyTall

Hosta (shade companion)

Where it is too dark for daylilies, hostas take over — grown for bold foliage in full to part shade, with summer flower spikes.

ShadeFoliageMid-border

Ferns & heuchera

Low shade companions that pair beautifully with hostas and the shadier edge of a daylily bed, adding texture and leaf colour.

ShadeFoliageLow

Astilbe for damp shade

Feathery plumes for a moist, shaded corner — a soft vertical accent behind hostas and late in the season.

ShadeLateTall
No match for that combination — try widening a filter.

General plant styles for planning, not specific cultivars. Always check a variety’s mature size and hardiness for your zone before buying.

Bloom time

A bed that flowers all summer

Because a single plant blooms for a few weeks, the trick to a long-flowering garden is to combine varieties with different bloom seasons. Plant early, midsummer and late types together and you can have daylilies in flower from roughly late June into September.

Reblooming daylilies take this further, sending up fresh scapes after their first flush. Removing spent scapes once they finish — and keeping plants watered — encourages the strongest repeat performance.

Each flower lasts a day, so there is no point deadheading for the plant’s health; it is purely tidiness. Simply snap off yesterday’s faded blooms if you prefer a neater look, and cut the whole scape down once all its buds are spent.

Daylily bloom seasons
Earlylate June
MidJuly
LateAug–Sept

Mix all three, add a rebloomer, and the border never goes bare.

Going deeper

Understanding daylily types

Once you start reading plant tags and catalogues, a few terms come up again and again. Knowing them helps you choose wisely — and sounds daunting only until it is explained.

Foliage habit: dormant, evergreen, semi-evergreen

This describes what the leaves do in winter. Dormant types die back fully and are the most reliable in cold Canadian winters. Evergreen types keep their leaves and suit mild climates; they can struggle where winters are harsh. Semi-evergreen falls in between. For most of Canada, dormant varieties are the safe default.

Ploidy: diploid and tetraploid

You will see plants labelled diploid or tetraploid, referring to the number of chromosome sets. Tetraploids tend to have bigger, more intensely coloured flowers and sturdier scapes; diploids are often more graceful and include many of the spider and unusual forms. Neither is “better” — it is a matter of the look you want.

Flower form

Forms range from the classic rounded single, to ruffled and overlapping petals, to doubles with extra layers, and airy spiders and unusual forms with long, narrow segments. Some have contrasting eyes (a ring of colour in the throat) or picotee edges. Form matters as much as colour when you picture a plant in the garden.

Size and bloom window

Height is given for the scape, not the leaves, and ranges from dwarf edgers under 30 cm to giants over a metre. Catalogues also note bloom season (early, mid, late) and whether a plant reblooms. Combining these is how you build a bed that flowers from early summer well into fall.

Year-round care

The seasonal care calendar

Daylilies and hostas ask very little, but a few well-timed jobs keep them vigorous. Pick a season to see what to do.

  • Clear away last year’s dead foliage to make room for new growth.
  • Apply a single balanced feed (such as 10-10-10) as shoots emerge.
  • Divide and replant overgrown clumps while growth is young.
  • Top up mulch to hold moisture and suppress weeds.
  • Watch for slugs on emerging hosta shoots and act early.
  • Water deeply during dry spells, especially newly planted clumps.
  • Remove spent scapes once all their buds have finished.
  • Note which varieties bloom when, to plan next year’s gaps.
  • Deadhead reblooming types to encourage a second flush.
  • Enjoy peak bloom — and resist touching unopened buds in hybrid beds.
  • Divide daylilies in early fall if you did not in spring — allow six weeks before hard frost.
  • Cut back yellowing foliage as plants go dormant.
  • Plant new daylilies and hostas while the soil is still warm.
  • Lift and divide crowded hostas as they die back.
  • Rake up hosta leaves to remove slug eggs and overwintering pests.
  • Little to do — both plants are fully dormant and cold-hardy.
  • A light winter mulch helps in exposed or first-year beds.
  • Browse catalogues and plan new varieties and colour combinations.
  • Order bare-root daylilies for spring delivery.
  • Sketch your bloom-season plan so next summer has no gaps.

How to divide a daylily

Every three to five years, bloom drops off and clumps grow congested — the sign it is time to divide. Lift the whole clump with a fork, shake off loose soil, and tease or cut it into sections, each with several leaf fans and a good share of roots.

Trim the foliage back to about 15 cm (6 inches) to reduce stress, then replant promptly at the same depth, water well, and keep the divisions moist until they take hold. It is the single best way to rejuvenate tired plants — and to multiply your favourites for free.

For the shade

Hostas: the shade partner

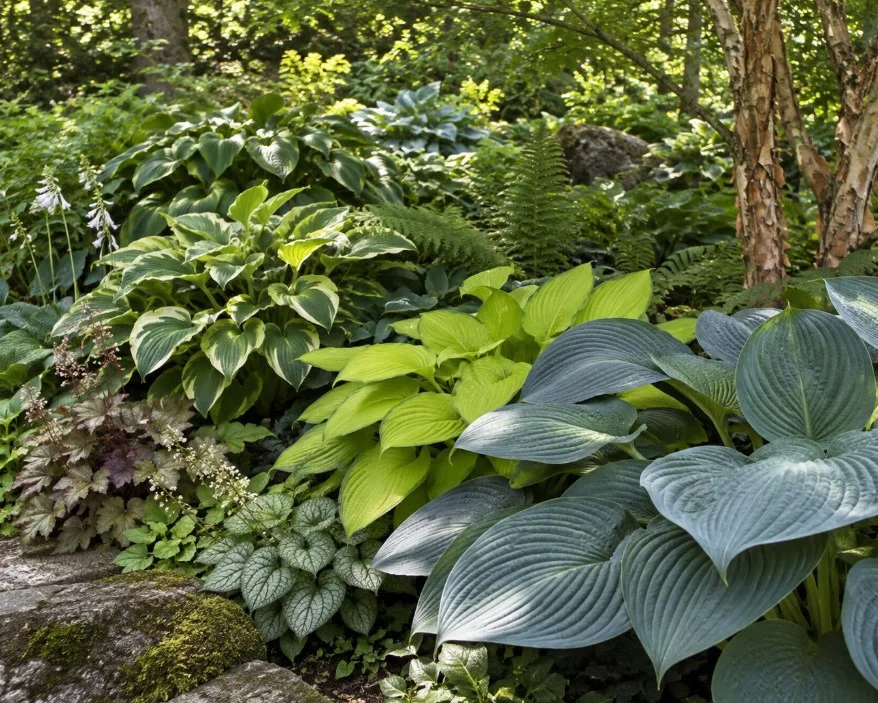
Lush green foliage in a shaded garden bed

Where daylilies run out of sun, hostas take over. Grown mainly for their bold, sculptural leaves — in greens, blues, golds and variegated patterns — they are the backbone of a shade garden and a natural companion to the shadier edge of a daylily bed.

Hostas prefer part to full shade and a moist, well-drained soil rich in organic matter. Blue-leaved types in particular want more shade, as hot sun scorches their foliage; gold and variegated kinds can usually take a little more morning light. Like daylilies, they are hardy through most of Canada, roughly zones 3 to 9, and are long-lived.

Their main enemy is slugs and snails, which chew holes in the leaves. Rake up debris in fall, water in the morning so foliage dries by evening, and use barriers or traps rather than reaching for harsh chemicals. Divide crowded clumps in spring or early fall, just as you would a daylily.

Hostas come in a huge range of sizes and leaf colours, from tiny mouse-ear types a few centimetres across to giants spanning well over a metre. As a rough guide to siting: blue hostas (their colour is a waxy coating) want the most shade, gold and variegated types take a little more morning sun to bring out their colour, and thick-leaved varieties shrug off slugs best. Group three or five of one kind for impact rather than dotting singles about.
Side by side

Daylily vs hosta

They are often planted together because they are opposites that cover each other’s weaknesses — sun and shade, flower and foliage.

 DaylilyHosta
Grown forFlowersFoliage
LightFull sun to light shadePart to full shade
Peak interestSummer bloomSpring to fall leaves
SoilAverage, well-drainedMoist, rich, well-drained
Main pestRarely troubledSlugs and snails
HardinessZones 3–9Zones 3–9
DivideEvery 3–5 yearsEvery 4–6 years
Round out the border

Best companion perennials

Daylilies and hostas form the structure; these reliable perennials fill the gaps and extend the season in a Canadian garden.

For sun, beside daylilies

Pair sun-loving daylilies with coneflower (Echinacea), black-eyed Susan (Rudbeckia), salvia, catmint, bee balm and sedum. These bloom in overlapping waves, draw pollinators and share the daylily’s love of sun and good drainage. Ornamental grasses add movement behind them.

For shade, beside hostas

In the shade, combine hostas with ferns, heuchera (coral bells), astilbe, brunnera and bleeding heart. Contrasting leaf shapes and heights keep a shade bed interesting even when little is in flower, and most thrive in the same moist, rich soil hostas prefer.

Zone tip for Canadian gardeners: most of these perennials, like daylilies and hostas, are hardy to zone 3 or 4, so they overwinter across much of the country. In milder coastal areas such as the south coast of British Columbia (zones 7–8), the growing season is longer and the planting window wider — but the same planting and dividing rules apply. Always confirm a plant’s hardiness for your local zone.

Avoid these

Common mistakes

Planting the crown too deep

The number one reason a healthy daylily refuses to bloom. Keep the crown about an inch below the surface, no more.

Too much shade

Daylilies in deep shade produce leaves but few flowers. If a spot is dark, plant hostas there instead and move the daylilies to the sun.

Never dividing

Left for a decade, clumps grow woody and bloom fades. Dividing every few years keeps them young and gives you free plants.

Overfeeding

Heavy nitrogen produces lush foliage and few flowers. One modest spring feed is all daylilies need in decent soil.

Ignoring slugs on hostas

By the time leaves are full of holes, the damage is done. Clear debris, water in the morning, and set traps early in spring.

Touching blooms in a hybridizer’s bed

In a display or breeding garden, never deadhead, move or sniff flowers unless invited — a knocked scape can undo a season of cross-pollination work.

The journal

Latest from the blog

Is Gardening a Good Screen-Free Hobby? A Realistic Comparison With Digital Leisure

Read more →

How to Design a Daylily Garden Bed for Colour All Summer

Read more →

When to Divide Daylilies: Spring vs. Late Summer in Canadian Gardens

Read more →
Questions

Daylily & hosta FAQ

How much sun do daylilies need?

At least six hours of direct sun a day for the best bloom. They tolerate light or part shade, and dark-flowered varieties even keep their colour better with some afternoon shade, but deep shade gives leaves and few flowers.

How deep do I plant a daylily?

Set the crown — where the roots meet the leaves — about one inch (2.5 cm) below the soil surface. Planting too deep is the most common reason a daylily grows well but refuses to flower.

When and how do I divide daylilies?

Divide every three to five years, in early spring or early fall, when bloom drops off or clumps get crowded. Lift the clump, split it into sections with several fans and roots each, trim the leaves to about six inches, and replant at the same depth.

Why won’t my daylilies bloom?

The usual causes are too much shade, a crown planted too deep, overcrowding that needs dividing, or too much nitrogen fertilizer, which favours leaves over flowers. Fix whichever applies and bloom usually returns.

Do I need to deadhead daylilies?

Not for the plant’s health — each flower only lasts a day regardless. Deadheading is purely for tidiness, though removing spent scapes on reblooming types can encourage a second flush.

Are daylilies and hostas hardy in Canada?

Yes. Both are hardy roughly from zone 3 to zone 9, which covers most of the country. They handle cold winters well; a light mulch helps in exposed or first-year beds.

What is the difference between a daylily and a hosta?

Daylilies are grown for summer flowers and want sun; hostas are grown for foliage and want shade. They are often planted together because one thrives exactly where the other struggles.

How do I keep slugs off my hostas?

Clear leaf litter where slugs hide, water in the morning so foliage dries by night, and use barriers or traps early in the season. Choosing thicker-leaved hosta varieties also helps, as slugs find them harder to chew.

Plan a garden that blooms for months

Use the plant finder to match varieties to your light, then follow the seasonal calendar to keep everything thriving.