How to Design a Daylily Garden Bed for Colour All Summer

19 min read
Contents
- Start With the Garden You Have, Not the Plants You Want
- Measure the space and watch the sunlight
- Decide what the bed should look like outside bloom season
- Check drainage and winter conditions
- Choose Daylilies by Height, Habit and Bloom Season
- Compact daylilies for edging
- Mid-height cultivars for the main planting
- Tall varieties for accents and background
- Why foliage habit matters in cold climates
- Build a Bloom Sequence Instead of Relying on One Variety
- Early, midseason and late bloomers
- What reblooming varieties can and cannot promise
- Use other perennials to carry the gaps
- Arrange the Bed So It Looks Good From Every Angle
- Front, middle and back planting layers
- Repeat plants rather than collecting one of everything
- Leave room for mature clumps
- Two Practical Daylily Border Layouts
- Layout A — A 1.2 m × 3 m sunny border
- Layout B — A 2 m × 5 m mixed perennial border
- Where Hostas Fit Into a Daylily Garden
- Designing a transition between sun and shade
- Using foliage contrast without compromising growing conditions
- Planting, Establishment and the First Two Years
- Prepare soil for the whole bed
- Space plants for their mature size
- Expect the design to mature gradually
- Keep the Border Attractive After the Main Flush
- What to trim and what to leave
- When to divide or rearrange plants
- Plan for a changing garden
- A Final Planting Checklist Before You Buy
A daylily border can be dazzling in July and disappointingly green by August. The flowers are rarely the problem. More often, the bed was planted for one spectacular moment rather than for the entire growing season.
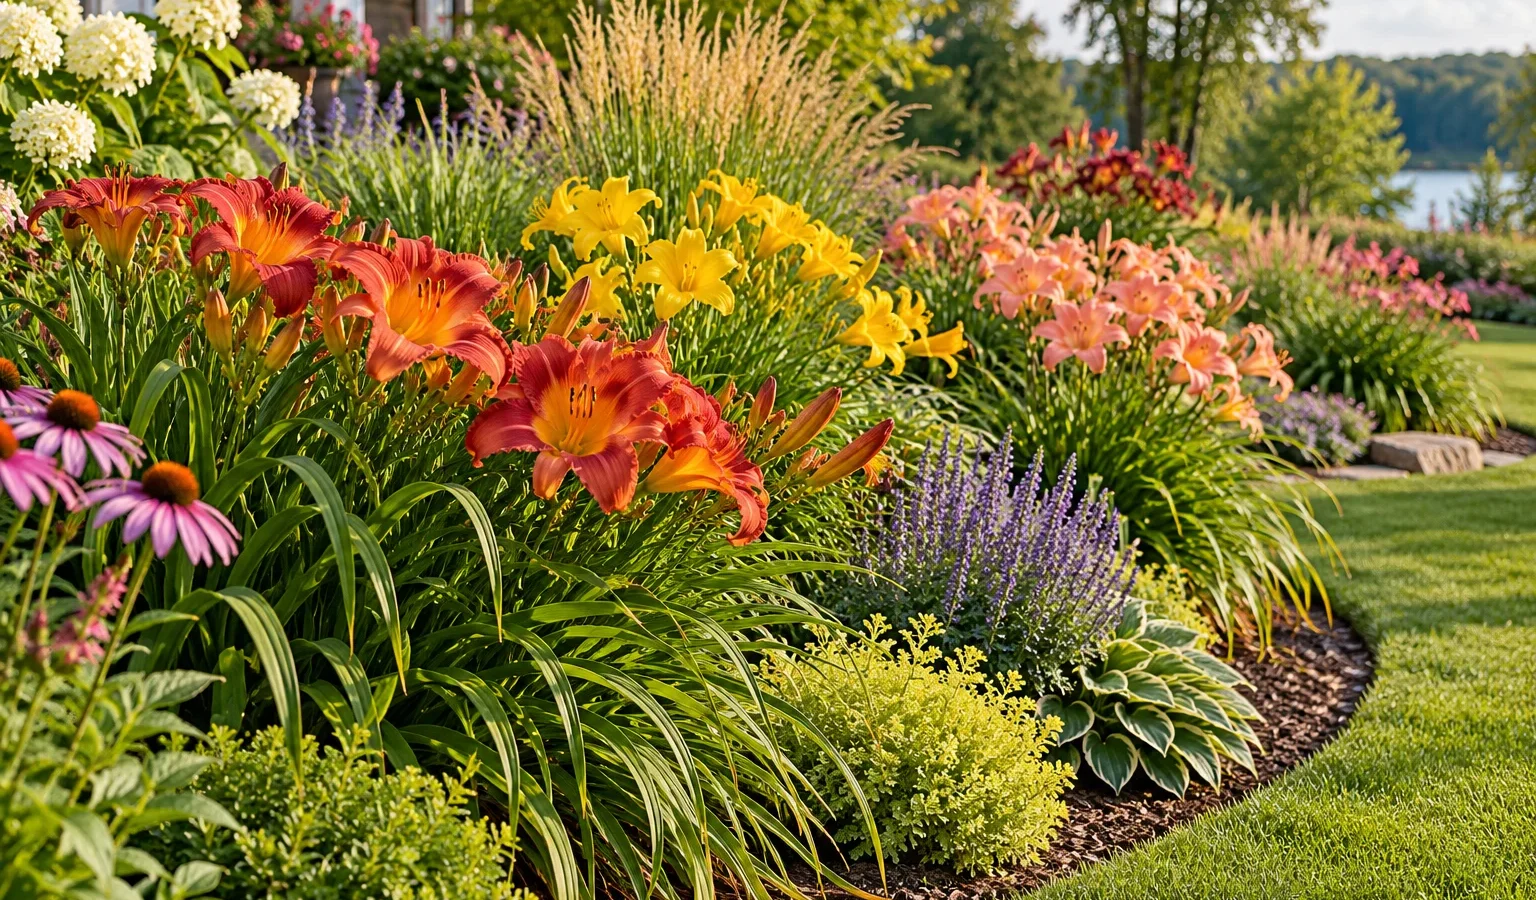
Good daylily garden design starts with three decisions: where the plants will grow, how their flowering periods overlap, and what will keep the border attractive between blooms. Get those right, and a modest collection of daylilies, ornamental grasses and companion perennials can create a garden that looks intentional from spring through fall.
Start With the Garden You Have, Not the Plants You Want
Before choosing flower colours or browsing cultivar catalogues, establish what your planting area can realistically support.
Daylilies (Hemerocallis) are adaptable, long-lived perennials, but a border designed for full sun will not perform the same way in a shaded yard. Neither will a planting that thrives in well-drained soil necessarily succeed where water collects every spring.
Measure the space and watch the sunlight
Start with the bed’s length and depth. Measure the usable planting area rather than the entire space between a fence and a pathway.
A border measuring 1.2 m deep and 3 m long has 3.6 m² of planting space. That is enough for several compact daylilies and low-growing companions, but not for a collection of large cultivars that eventually spread nearly a metre across.
Next, assess sunlight during the growing season.
Daylilies generally flower best with at least six hours of direct sunlight. The University of Saskatchewan’s gardening guidance identifies six hours as a useful minimum for these plants, even though they tolerate some shade.
Observe the space in the morning, around midday and during the afternoon. A location that appears sunny in early spring may receive considerably less light once nearby trees develop their full canopy.
Use the following conditions to guide the design:
| Site condition | Suitable design approach | What to avoid |
|---|---|---|
| Full sun, at least six hours | Daylily-focused border with coneflowers, salvia and ornamental grasses | Large, shade-dependent hostas in exposed positions |
| Morning sun, afternoon shade | Daylilies in the brightest section, transitioning towards hostas and heucheras | Assuming every daylily will flower as heavily as in full sun |
| Mostly shade | Hosta-led foliage garden with ferns and other shade perennials | A daylily-heavy design that depends on abundant flowers |
| Sunny but poorly drained | Improve drainage or consider a suitably constructed raised bed | Planting crowns into persistently saturated soil |
Decide what the bed should look like outside bloom season
A daylily flower lasts only about a day, although each flower stalk, or scape, carries multiple buds that open in succession. An established clump may flower for several weeks, depending on the cultivar and growing conditions.
That still leaves much of the season when its leaves, rather than its flowers, define the planting.
Think about the border in three stages.
In spring, daylily foliage emerges as arching green fans. Early companions such as catmint and salvia can provide the first flowers.
During midsummer, the daylilies become the main attraction.
Later, coneflowers, asters, upright stonecrop and ornamental grasses maintain structure and colour after many daylily cultivars finish blooming.
A useful design should work in all three stages, not just when everything is flowering.
Check drainage and winter conditions
Daylilies tolerate many soil types, including clay and sandy soils, provided drainage is adequate.
Avoid places where water remains standing after prolonged rain or spring snowmelt. Winter saturation can be especially troublesome because roots may remain in cold, poorly aerated soil for extended periods.
In coastal British Columbia, winter moisture can be as important a consideration as minimum temperature. In colder inland regions, frost exposure, snow cover and the duration of the growing season may have a greater influence on cultivar selection.
Natural Resources Canada’s updated plant hardiness mapping, based on 1991–2020 climate data, provides a useful starting point. The Canadian system considers several climate variables, not just extreme minimum temperature.
Check the hardiness rating of each cultivar, and remember that a plant surviving winter does not automatically guarantee reliable flowering or reblooming.
Choose Daylilies by Height, Habit and Bloom Season
Colour is the most tempting way to shop for daylilies, but height and flowering behaviour determine where a plant belongs.
A useful distinction: catalogue height generally refers to the flowering scape, not the height of the leaves. A cultivar with tall flower stems may still have comparatively compact foliage.
Compact daylilies for edging
Compact cultivars are useful near pathways and at the front of narrow beds.
Many produce scapes around 30–45 cm tall, although individual varieties differ. Their smaller proportions make it easier to appreciate the flowers without blocking the rest of the planting.
‘Stella de Oro’ is a familiar example of a compact yellow daylily. ‘Happy Returns’ offers another yellow-flowered option, with a softer appearance.
Both are commonly described as reblooming cultivars, but their performance depends on local growing conditions.
For a neat edge, repeat the same compact cultivar rather than alternating several unrelated varieties.
Mid-height cultivars for the main planting
Daylilies with scapes approximately 45–75 cm tall work well through the centre of a mixed border.
They are substantial enough to become the main flowering feature without necessarily overwhelming lower companions.
‘Pardon Me’, with its red flowers and yellow-green throat, is one familiar example. Other cultivars offer peach, coral, lavender, burgundy and cream tones.
Choose mature width as carefully as height. A medium-height plant can still develop into a broad, vigorous clump.
Tall varieties for accents and background
Taller cultivars, sometimes exceeding 90 cm in scape height, provide vertical accents.
They work especially well towards the back of a one-sided border or in the central sections of a bed viewed from several directions.
Avoid arranging every tall cultivar in one continuous row. That can produce a rigid wall of flower stems during bloom and an unremarkable band of foliage afterwards.
Small, repeated groups usually create a more natural effect.
Why foliage habit matters in cold climates
Daylily catalogues describe foliage as dormant, evergreen or semi-evergreen.
Dormant cultivars naturally lose their foliage during winter. They are often sensible choices for colder regions, particularly when selected from locally proven varieties.
Evergreen and semi-evergreen cultivars behave differently during dormancy, but these descriptions are not absolute measures of cold hardiness. Some evergreen cultivars perform successfully in cold climates.
For gardeners in Alberta, Saskatchewan, Manitoba or other regions with severe winters, proven local performance matters more than an attractive catalogue photograph.
A cultivar grown successfully by a nearby gardener is often a more useful reference than one described as reliable in a much warmer climate.
Build a Bloom Sequence Instead of Relying on One Variety
A long-flowering daylily garden is created by overlapping bloom periods, not by expecting a single cultivar to flower continuously.
Early, midseason and late bloomers
Daylily catalogues commonly identify varieties as early, midseason or late flowering. These terms describe their relative bloom periods, not guaranteed calendar dates.
A useful planning approach is to choose several cultivars from each flowering group, while giving the central part of the season the greatest visual emphasis.
The following calendar illustrates a possible sequence for a temperate southern Canadian garden.
| Period | Daylily interest | Supporting plants |
|---|---|---|
| May–June | Emerging foliage; earliest cultivars may begin | Catmint, salvia, hardy geraniums |
| Late June–July | Early and midseason daylilies | Salvia, coneflowers, bee balm |
| July–August | Midseason and later daylilies | Rudbeckia, garden phlox, coneflowers |
| August–September | Late cultivars and possible rebloom | Asters, upright stonecrop, ornamental grasses |
| Autumn | Remaining foliage and seed heads | Ornamental grasses, asters and stonecrop |
These periods are illustrative. Flowering can begin later in shorter-season regions, and not every cultivar or companion will continue into September.
A useful Canadian example comes from Whitehouse Perennials near Ottawa, which describes peak daylily bloom in its garden as occurring around the middle to end of July. This is a local observation, not a fixed schedule for the country.
What reblooming varieties can and cannot promise
Reblooming daylilies produce additional flower scapes after their initial flowering period under suitable conditions.
That sounds ideal for a border intended to remain colourful all summer, but it should not be the foundation of the entire planting plan.
In shorter-season climates, some reblooming varieties may produce only their main flush.
University of Minnesota Extension specifically cautions that reblooming performance is limited by Minnesota’s short growing season. The same consideration is relevant to many colder Canadian gardens.
Adequate sunlight, moisture and an established root system can improve flowering performance, but they cannot create a longer growing season.
Treat rebloom as a welcome bonus. Build the main design around dependable seasonal succession.
Use other perennials to carry the gaps
When daylilies finish flowering, their neighbours should take over visually.
Catmint and salvia can provide early interest. Coneflowers and black-eyed Susans overlap with summer daylilies. Fall-blooming asters and upright stonecrop extend colour later in the season.
Ornamental grasses contribute texture even before their seed heads develop.
A planting plan can only deliver a long flowering season if the plants are healthy and well placed, so it helps to know what to check when daylilies produce fewer flowers than expected.
Arrange the Bed So It Looks Good From Every Angle
The arrangement of plants matters as much as their individual appearance.
A successful perennial border uses height, repetition, foliage texture and open space to create a composition that remains coherent as different plants flower.
Front, middle and back planting layers
For a border viewed mainly from a pathway or lawn, a three-layer arrangement works well:
- Front: Compact daylilies, low catmint, hardy geraniums or other plants that soften the edge.
- Middle: Medium-height daylilies, coneflowers and similar perennials that provide the main summer display.
- Back: Taller daylilies, asters, garden phlox and appropriately sized ornamental grasses.
The layers need not form perfectly straight rows. Stagger plants and allow selected groups to extend slightly forward or backward.
For an island bed viewed from every direction, place taller plants nearer the centre and lower plants towards the perimeter.
Repeat plants rather than collecting one of everything
A bed containing ten different daylily cultivars can become visually busy, particularly when every variety has a different colour, height and flower form.
Repeating a limited selection creates rhythm.
For example, three groups of peach-coloured daylilies separated by blue-violet catmint produce a stronger sense of unity than an assortment of unrelated specimens.
Repeating companions is equally useful. A small drift of coneflowers is more visually effective than one coneflower placed between several unrelated plants.
The most attractive flower combinations are not always the most practical, which is why choosing companion plants that share the same growing conditions matters more than colour alone.
Leave room for mature clumps
Newly planted perennials often look too far apart. That is normal.
Daylily clumps expand, ornamental grasses increase in diameter, and spreading companions can occupy considerably more space after several growing seasons.
Use the expected mature width rather than the pot size when calculating planting distances.
For example, a 3 m row planted with daylilies expected to reach 60 cm across could theoretically accommodate about five plants at 60 cm centre-to-centre spacing. But that assumes the entire row is devoted to daylilies.
A mixed border also needs room for companions, visual spacing and access. Three daylilies in that same row may create a better long-term composition.
Compact edging and mixed borders therefore require different approaches. In a narrow edging bed, select smaller cultivars and repeat them closely enough to create continuity. In a larger mixed border, use broader groupings with more generous spacing between plant types.
Two Practical Daylily Border Layouts
These example designs show how the principles work in real planting spaces. Both assume reasonably well-drained soil and suitable plant hardiness.
The arrangements are conceptual top-down plans, not scale engineering drawings. Final positions should be adjusted to the mature widths of the cultivars you select.
Layout A — A 1.2 m × 3 m sunny border
Best for: A narrow bed along a pathway, fence or sunny front-yard boundary.
Total area: 3.6 m².
Plant list:
- 3 medium-height daylilies with mature widths around 60 cm
- 2 compact daylilies with mature widths around 40–45 cm
- 3 compact catmints with mature widths around 35–40 cm
Choose one medium-height daylily cultivar and repeat it three times. Use a contrasting compact variety at the front, such as a soft yellow against peach or coral flowers.
Select a genuinely compact catmint rather than a vigorous spreading form.
Top-down planting scheme
Back — fence or property boundary
Medium daylily · Medium daylily · Medium daylily
Front — pathway
Catmint · Compact daylily · Catmint · Compact daylily · Catmint
Place the three larger daylilies approximately 85–95 cm apart along the back portion of the bed, while keeping sufficient clearance from the fence for their mature foliage.
Stagger the smaller plants across the front, adjusting their positions so mature clumps have space without excessively overlapping.
Avoid using large catmint cultivars here. Their spread could quickly overwhelm the compact daylilies.
The design relies on repetition rather than variety. Its medium-height daylilies form the main summer display, compact daylilies introduce flowers near the pathway, and catmint supplies contrasting foliage and earlier colour.
A narrow border also benefits from simple maintenance. Every plant should be reachable without stepping into the bed.
When this layout makes sense: Small sunny spaces where a restrained planting is easier to maintain than a large perennial collection.
When it does not: Heavily shaded sites, poorly drained ground or locations where only large daylily cultivars are available.
Layout B — A 2 m × 5 m mixed perennial border
Best for: A larger sunny backyard bed that needs colour from early summer into autumn.
Total area: 10 m².
Plant list:
- 6 medium-height daylilies, arranged as two groups of three
- 3 coneflowers
- 3 compact fall-blooming asters
- 2 compact, clump-forming ornamental grasses
- 4 compact catmints
Choose daylilies with complementary colours and different flowering periods. For example, one group could contain an earlier yellow or peach cultivar, while the second uses a later red or burgundy selection.
The coneflowers provide a midsummer bridge, while asters maintain flower colour later in the season.
Select ornamental grasses with a mature spread that suits the available space. Compact feather reed grass or appropriately sized switchgrass cultivars are possible options, depending on local hardiness and conditions.
Top-down planting scheme
Back — fence or hedge
Grass · Three asters · Grass
Middle — main flowering area
Three daylilies · Three coneflowers · Three daylilies
Front — pathway or lawn
Catmint · Catmint · Catmint · Catmint
The middle groups should be arranged as staggered clusters rather than nine plants in one tight line.
For daylilies expected to reach roughly 60 cm in width, start with approximately 60–75 cm between centres within a group. Allow similar or slightly smaller spacing for coneflowers and compact asters, depending on the selected cultivars.
The grasses should remain clearly separated from their neighbours at maturity. Avoid large switchgrass selections that can spread too widely for a 2 m deep border.
Use catmint to establish a continuous visual edge without creating a solid mass that crowds the plants behind it.
This layout offers a more varied seasonal sequence than Layout A. Early catmint flowers lead into the main daylily and coneflower display. Asters and ornamental grasses carry the border through late summer and into autumn.
Because the bed is 2 m deep, access matters. Ideally, provide access from both long sides or incorporate unobtrusive stepping stones where maintenance would otherwise require walking through the plants.
When this layout makes sense: A sunny garden with enough space for several perennial groups and a gardener willing to do occasional dividing and seasonal maintenance.
When it does not: Very narrow sites, deep shade or beds where the available depth is reduced by large tree roots.
Neither layout needs to be planted to its maximum capacity immediately. Leaving some space for growth will make both easier to manage after the first few years.
Where Hostas Fit Into a Daylily Garden
Daylilies and hostas are often pictured together because their foliage forms complement each other.
Daylilies produce narrow, arching leaves and conspicuous flowers. Hostas offer broad leaves in green, blue, gold and variegated patterns.
The combination works best where growing conditions change across the planting area.
Designing a transition between sun and shade
Imagine a border extending from an open lawn towards a group of mature deciduous trees.
Place the daylilies towards the sunny lawn, where they receive the light needed for strong flowering. Use hostas farther into the shaded section, with heucheras or other adaptable perennials occupying the transition.
This creates a natural progression rather than forcing both plants to tolerate identical conditions.
Do not assume that morning sun and afternoon shade automatically provide enough direct light for every daylily. Observe the actual number of sunlit hours before choosing cultivars.
Using foliage contrast without compromising growing conditions
A blue hosta beside a peach-coloured daylily can be striking, but leaf colour is not the only consideration.
Blue hostas generally retain their characteristic waxy appearance better in shade. Some golden or variegated selections tolerate more morning sunlight.
In exposed, dry locations, hosta foliage can scorch even while the daylilies remain vigorous.
If the entire border is deeply shaded, a hosta-led design with ferns, brunnera and other shade perennials will usually outperform a daylily-focused planting.
Planting, Establishment and the First Two Years
A planting plan is only as successful as its establishment.
Daylilies can survive difficult conditions once established, but newly installed perennials need more consistent attention.
Prepare soil for the whole bed
Remove perennial weeds and their roots before planting. Trying to extract established grasses from the middle of mature daylily clumps is much more difficult later.
Loosen compacted soil without unnecessarily disturbing nearby tree roots. Incorporate finished compost where organic matter is lacking, but avoid creating isolated pockets of heavily amended soil surrounded by dense clay.
Drainage should remain the priority. If water regularly collects after rain, solve that problem before installing plants.
Space plants for their mature size
Set each daylily with the crown approximately 2.5 cm below the finished soil surface.
Water thoroughly after planting, then apply a modest layer of organic mulch while leaving the crowns uncovered.
Record each cultivar’s mature width and expected flowering period. This helps prevent accidental overcrowding and makes later adjustments easier.
For established gardens receiving new companion plants, consider existing root systems. Digging directly into a dense daylily clump can damage more roots than expected.
Expect the design to mature gradually
During the first season, the bed may look relatively sparse. Plants are developing roots, and recently divided daylilies may produce fewer flowers.
By the second growing season, many established perennials begin filling their allotted spaces and the intended groupings become easier to appreciate.
Some plants will mature faster than others. Catmint may spread quickly while a smaller daylily division remains relatively compact.
Resist filling every gap with additional perennials. Temporary mulch or a modest number of suitable annuals can provide coverage without compromising the long-term layout.
A border should be designed for its mature appearance, not just the day it is planted.
Keep the Border Attractive After the Main Flush
Once the principal daylily display finishes, attention shifts from the flowers to the shape and condition of the planting.
What to trim and what to leave
Remove spent flower scapes after all their buds have finished opening. Cutting the empty stalks near the base improves the appearance of the border.
Individual faded daylily flowers can be removed for tidiness, but doing so does not automatically trigger another flush of blooms.
Leave healthy foliage in place while it continues growing. Removing green leaves simply because the flowers have finished can weaken the plant and create an unnecessary gap.
Conflower seed heads and ornamental grass stems can remain attractive later in the season. Selective cleanup often looks better than cutting the entire border down at once.
When to divide or rearrange plants
As the border matures, some clumps will need more space. Understanding the right time to divide an established daylily clump will make future changes easier.
Division is not automatically necessary every few years. Evaluate flowering, root competition and the amount of available space first.
If a clump continues flowering well, leave it alone unless you want additional plants or need to change the design.
Plan for a changing garden
Plants grow, neighbouring trees cast more shade, and the gardener’s preferences evolve.
Photograph the border from the same location during spring, peak summer and early autumn. Compare the images to see where flowering gaps occur and which plants visually dominate.
If the front edge becomes too dense, divide or move selected plants. If a late-season gap appears, introduce another suitable companion rather than automatically adding more daylilies.
Small adjustments are usually more effective than rebuilding an entire bed every few years.
A Final Planting Checklist Before You Buy
Before ordering plants or visiting a garden centre, check that the proposed design fits the actual garden.
- Sunlight: Does the planting area receive enough direct sunlight for the chosen daylilies?
- Drainage: Will the crowns remain free from prolonged standing water?
- Hardiness: Are the specific cultivars suited to the local climate, using the appropriate hardiness-zone system?
- Mature size: Is there enough space for every plant at its eventual width?
- Bloom sequence: Are early, midseason and late-season flowers represented?
- Foliage: Will the border remain attractive when the daylilies are not flowering?
- Maintenance: Can plants be watered, weeded and divided without trampling neighbouring perennials?
- Quantity: Are the numbers based on mature plant dimensions rather than the size of nursery pots?
A larger bed is not necessarily a better first project. Before committing to one, consider whether gardening suits the time you have for a new hobby, since even low-maintenance perennials need attention during establishment.
The most successful daylily gardens do not depend on having the largest collection or the rarest flowers. They use a manageable selection of reliable plants, repeat them thoughtfully and provide something attractive before, during and after the main flowering period.
Start with a bed that suits your space, allow the plants to reach their natural size, and make changes as the garden develops. A well-planned border should become more rewarding with each growing season, not more complicated.