When to Divide Daylilies: Spring vs. Late Summer in Canadian Gardens

12 min read
Contents
- Does Your Daylily Actually Need Dividing?
- Signs of overcrowding
- When it is better to leave the clump alone
- Spring or Late Summer: Which Is Better?
- Early spring division
- Division after flowering
- Why late fall can be risky in colder regions
- How Timing Changes Across Canada
- How to Divide a Mature Daylily Clump
- 1. Prepare the new planting area
- 2. Lift the plant without losing too many roots
- 3. Separate healthy fans and remove damaged growth
- 4. Replant at the right depth
- What to Do During the First Four Weeks
- What to Expect From the Next Bloom Season
A daylily clump that once produced dozens of flowers can eventually become a crowded mass of leaves with fewer blooms each summer. Dividing it can restore vigour and provide extra plants for another part of the garden. But the timing matters, particularly where autumn is short and the ground freezes early.
Early spring is generally the safest time to divide daylilies in colder Canadian climates. Late summer, after flowering, is another good option if the new divisions have sufficient time to establish roots before winter. The best choice depends on your growing season, the condition of the plant and whether you’re willing to sacrifice some flowers while it recovers.
Does Your Daylily Actually Need Dividing?
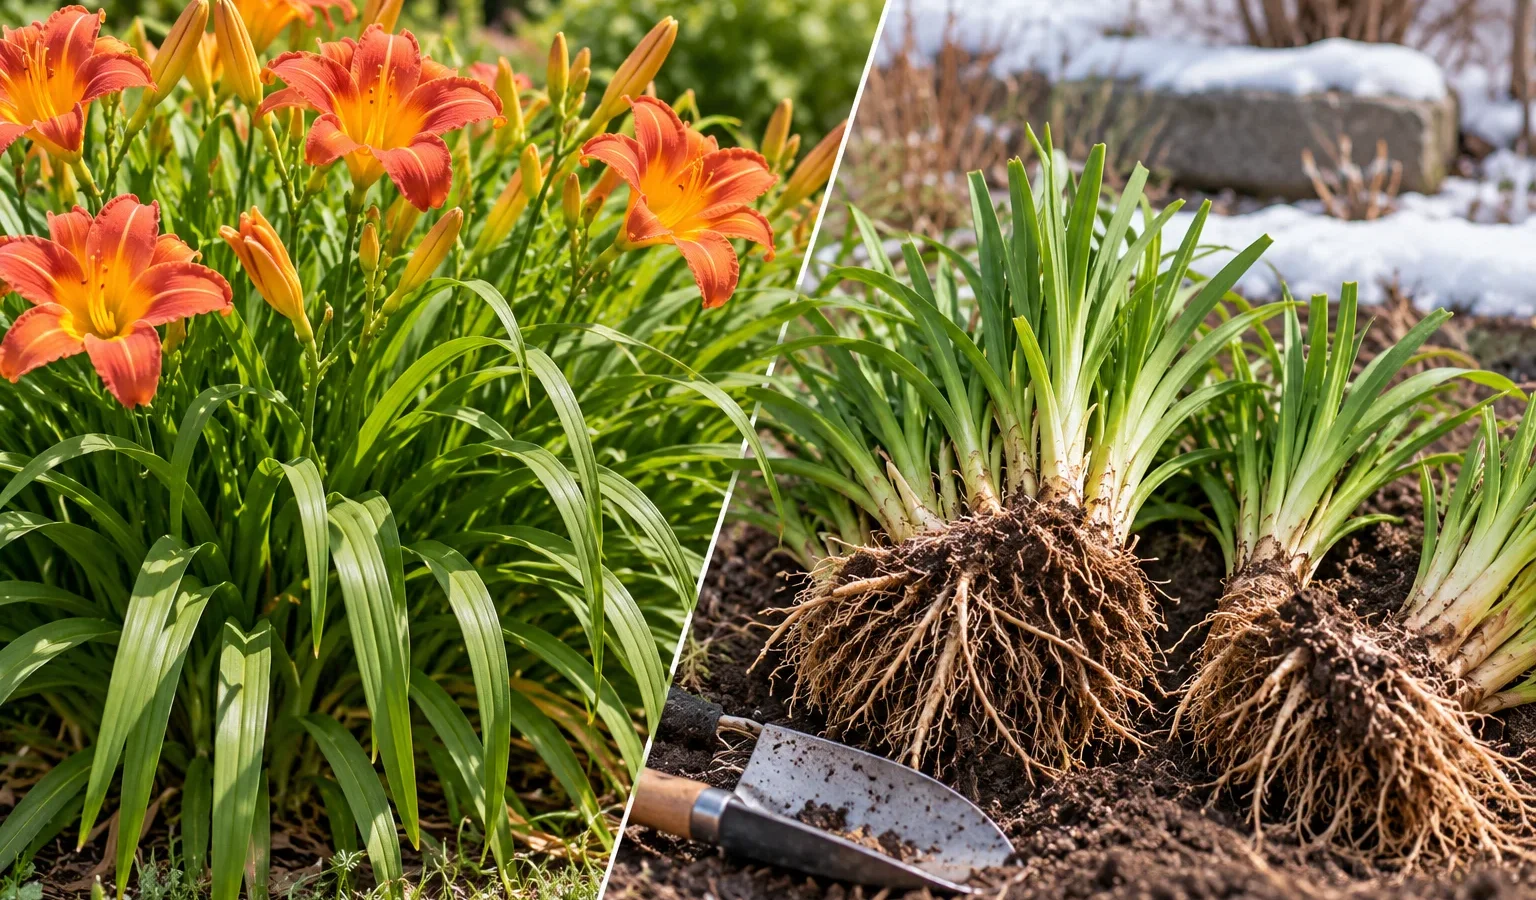
Daylilies (Hemerocallis) grow from fleshy roots attached to a crown, where the roots meet the leaf fans. As the plant matures, those fans multiply, gradually creating a larger clump.
Unlike some short-lived perennials, daylilies do not need dividing simply because a certain number of years has passed. A healthy, well-spaced plant can remain productive for years without intervention.
Signs of overcrowding
Consider dividing when you notice several of these changes:
- Flower production declines over two or more seasons despite adequate sunlight and moisture.
- The centre of the clump becomes thin, woody or noticeably less vigorous.
- Leaf fans are tightly packed, making it difficult to distinguish individual sections.
- The plant has expanded into neighbouring perennials or beyond its intended space.
- New growth remains concentrated around the outer edges of an increasingly congested clump.
Many gardening references suggest checking established daylilies for division after roughly three to five years. That is a useful reminder to inspect them, not a compulsory schedule. Vigorous varieties may need attention sooner, while slower-growing cultivars can remain undisturbed considerably longer.
When it is better to leave the clump alone
A large daylily that flowers reliably and has plenty of space may not benefit from division.
If flowering has declined, check the growing conditions first. Increased shade from a maturing tree, prolonged dry weather or a deeply buried crown can produce symptoms similar to overcrowding.
Dividing a healthy plant will not correct inadequate sunlight. It may temporarily reduce flowering by disturbing an otherwise established root system.
Spring or Late Summer: Which Is Better?
Both periods can work, but they offer different advantages. The main consideration is giving the roots time to recover without exposing newly divided plants to unnecessary heat, drought or freezing conditions.
| Consideration | Early spring | Late summer, after flowering |
|---|---|---|
| Best timing | As new shoots emerge and soil is workable | After the main bloom, with growing time remaining |
| Main advantage | A full growing season ahead for root establishment | The current flowering display is already finished |
| Main drawback | Flowers may be reduced or absent that summer | Limited rooting time before winter |
| Moisture concerns | Cold, saturated spring soil | Summer heat and drying soil |
| Best suited to | Cold regions and major clump divisions | Mild regions and early-finished cultivars |
| Avoid when | Soil remains frozen or waterlogged | Ground is likely to freeze soon |
Early spring division
Spring is a particularly practical choice for gardeners in the Prairies and other regions with a relatively short frost-free season.
Wait until the soil has thawed and the first green shoots are emerging. At this stage, you can identify the growing fans without having to work around fully developed foliage and flower stalks.
The plant then has spring and summer to establish its roots before winter.
There is a trade-off: spring division may reduce flowering during the same season. Smaller divisions sometimes concentrate on producing roots and leaves rather than flowers.
For an overcrowded clump that has already become less productive, accepting one modest flowering season may be worthwhile.
Division after flowering
Dividing immediately after the main bloom allows you to enjoy the current display before disturbing the plant.
This can work particularly well with early- and midseason cultivars. Once flowering has finished, the plants can redirect resources towards root development.
Choose a cool, preferably overcast day. Water the clump beforehand if the ground is dry, and avoid digging during a prolonged heatwave.
University of Minnesota Extension identifies early spring and immediately after flowering as suitable times for daylily division. Its guidance also notes that spring-divided plants may not flower during the same summer.
For reblooming varieties, division after the first flowering period may interrupt a potential second flush. If repeat flowering is important, spring may be the more convenient option.
Why late fall can be risky in colder regions
Daylilies are hardy, but freshly divided roots are less established than those of a mature clump.
As soil temperatures decline, root growth slows. A plant divided too late may enter winter before it has developed sufficient new roots to anchor itself and absorb moisture effectively.
Allowing approximately six weeks before the ground normally freezes is a sensible planning guideline, although it is not a guarantee. Soil temperature, rainfall and local weather matter more than a fixed calendar date.
The first light frost does not necessarily mean the soil has frozen. Still, waiting until the garden is approaching winter dormancy creates unnecessary risk, especially in exposed sites.
If the season is nearly over, leave a healthy clump intact and divide it the following spring.
How Timing Changes Across Canada
A September division that succeeds in a mild coastal garden may be poorly timed in a location where freezing temperatures arrive much earlier.
Provincial boundaries are not precise gardening calendars. Elevation, proximity to large bodies of water, snow cover and local exposure can all affect the available growing season.
| Region | Generally practical approach | Main consideration |
|---|---|---|
| Coastal British Columbia | Spring or after flowering in late summer | Avoid saturated winter soil and poorly drained sites |
| Southern Ontario | Spring or late summer, where sufficient rooting time remains | Summer heat, dry spells and variable autumn conditions |
| Prairie provinces | Prefer early spring; use caution with late-summer division | Shorter establishment period before frozen ground |
| Atlantic Canada | Spring or suitably early post-bloom division | Soil drainage, autumn moisture and local frost timing |
These are broad regional considerations, not fixed planting dates.
The Edmonton Horticultural Society identifies spring as the preferred division period for summer-flowering perennials such as daylilies. Its guidance places typical spring division in April or May in the Edmonton area, once the soil has thawed, and recommends completing fall divisions early enough for roots to establish.
That calendar should not automatically be applied to northern Alberta, higher elevations or other Prairie locations.
In southern Ontario, a gardener may have more flexibility after flowering, but a hot, dry August can be harder on newly divided plants than a cool spring.
In coastal British Columbia, a relatively long growing season can make post-bloom division convenient. However, winter rainfall and poor drainage can become more significant concerns than early freezing.
The practical question is not simply, “What month is it?” It is, “Will these plants have enough time and suitable soil conditions to develop roots before winter?”
How to Divide a Mature Daylily Clump
Daylilies are relatively forgiving plants, but careful handling makes establishment easier. The aim is to preserve healthy roots and create divisions large enough to recover without unnecessary stress.
Unlike true lilies, daylilies do not grow from bulbs. Each new division needs part of the crown, living leaf fans and a functioning root system.
1. Prepare the new planting area
Choose a location with well-drained soil and preferably at least six hours of direct sunlight.
Loosen the ground before lifting the original clump. If the soil is poor, work in some finished compost rather than relying on heavy fertilizer applications.
Water dry soil the day before division. Slightly moist soil is easier to work with, and hydrated roots are less vulnerable to stress.
Have a garden fork or spade, a clean sharp knife, a watering can or hose, and mulch ready.
2. Lift the plant without losing too many roots
Insert a garden fork into the soil outside the outermost leaf fans. Work gradually around the clump, loosening the ground from several directions.
Lift from underneath rather than pulling on the foliage.
Older clumps can have dense, intertwined roots. Some may be too heavy to lift comfortably in one piece, particularly in clay soil.
If necessary, use a sharp spade to separate a substantial outer section while leaving the remainder in place.
Shake off loose soil or rinse the roots gently with water. This reveals where individual fans join the crown and makes natural divisions easier to identify.
3. Separate healthy fans and remove damaged growth
Look for sections containing several healthy fans and a substantial portion of the fleshy roots.
A fan is a cluster of leaves emerging from a growing point at the crown. It is not the same as an individual leaf.
For most garden divisions, aim for two or three healthy fans with well-developed roots. Larger pieces with four or more fans may establish and fill a planting space more quickly.
Smaller divisions produce more individual plants, but they have fewer stored resources and may take longer to become impressive clumps.
Where sections separate naturally, ease them apart by hand. Use a clean, sharp knife or spade for densely connected crowns rather than tearing through healthy roots.
Remove soft, rotten or badly damaged root tissue. Firm roots that are merely discoloured should not automatically be discarded.
If dividing in late summer, trim long foliage to approximately 15 cm to reduce moisture loss. This is less important with short emerging spring shoots.
4. Replant at the right depth
Position each division so the crown sits approximately 2.5 cm below the finished soil surface.
Spread the roots naturally in the planting hole rather than bending them into a tight bundle. Backfill with soil, firm gently and water thoroughly to settle the soil around the roots.
Avoid burying the crown deeply. Excessively deep planting can contribute to poor growth and reduced flowering.
Spacing depends on the cultivar’s mature width, but approximately 45–75 cm between centres is a reasonable starting range for many garden daylilies. Compact varieties may need less space; particularly vigorous or large cultivars may need more.
Do not crowd newly divided plants simply because they look small. Their leaf fans will multiply as the clumps develop.
The sequence is straightforward:
Lift the clump → expose the roots → separate healthy fans → trim damaged growth → replant at the correct depth → water thoroughly.
What to Do During the First Four Weeks
A freshly divided daylily can look surprisingly untidy. Cut leaves may wilt, some older foliage may yellow, and visible growth can slow while damaged roots recover.
The priority during the first month is consistent moisture without waterlogging.
On planting day: Water thoroughly after backfilling. Apply a modest layer of organic mulch, roughly 5 cm deep, leaving the crown clear.
During the first week: Check the root-zone moisture frequently, especially during warm or windy weather. Water when the soil begins drying below the surface rather than automatically watering every day.
During weeks two and three: Continue checking moisture and look for signs of healthy new growth. Remove weeds before they compete with recovering roots.
During week four: Gradually move towards normal watering as the plant establishes, adjusting for rainfall and soil type.
New divisions growing in sandy soil may need more frequent watering than those in moisture-retentive loam. Heavy clay requires greater caution because roots can suffer if the ground remains saturated.
Avoid heavy fertilizer applications immediately after division. Healthy roots, suitable soil and reliable moisture matter more than forcing rapid top growth.
If the division was completed late in the season, mulch can help moderate soil temperatures and reduce freeze-thaw movement. Keep mulch loose and avoid creating a wet mound over the crown.
A plant that loses some older foliage but develops firm new growth is usually recovering. Persistent collapse, soft crowns or rotting roots indicate a problem that deserves closer inspection.
What to Expect From the Next Bloom Season
Dividing daylilies can improve long-term flowering, but the effect is rarely immediate.
A division with several healthy fans and substantial roots may bloom the following season, sometimes even in the year it was divided. Smaller pieces often need additional growing time.
Iowa State University Extension notes that divided daylilies may flower poorly for one or two years. That is a possible establishment period rather than a prediction that every divided plant will take two years to bloom.
Several factors influence recovery:
- Division size: Larger divisions retain more roots and stored resources.
- Timing: Spring divisions have more growing time before winter, but flowering that summer may be reduced.
- Moisture: Dry conditions immediately after planting can delay root establishment.
- Sunlight: Divisions placed in shade may survive but remain poor bloomers.
- Planting depth: Crowns buried too deeply may struggle even when the original plant was vigorous.
Resist the temptation to divide the same plant again because it failed to flower immediately. Repeated disturbance can delay recovery.
If you have more healthy divisions than space in the original bed, designing a new bed around your daylily divisions is a practical way to expand the garden without buying every plant again.
Extra divisions can also be shared with neighbours or exchanged through local garden clubs, provided the plants are healthy and free from visible pests or disease.
A useful approach is to label each new planting with its cultivar name, if known, and the division date. Take a photograph during the first summer and compare its growth the following year. This makes it easier to distinguish normal establishment from a persistent growing problem.
Daylilies do not need constant intervention to remain productive. Divide when crowding, declining flowers or a change in garden layout gives you a reason to do so. In a cold region, spring usually provides the most forgiving window; in a milder garden, dividing soon after flowering can work just as well.
The best division is one that leaves the plant with healthy roots, enough growing time and a suitable place to mature. Give it those three things, and the new clumps can become long-lived additions to the garden.